
Servers using the Model Context Protocol (MCP) from Anthropic have become the industry standard approach for extending the capabilities of Large Language Models (LLMs) and creating agentic workflows. WebAssembly (Wasm) components are quickly emerging as the ideal unit of deployment, providing a secure-by-default sandbox for MCP servers.
In this blog, we'll explain how you can use the open source Wasm Shell (wash) CLI and OpenAPI2MCP to quickly and easily develop MCP servers that enable models to use APIs defined in the OpenAPI specification—and then compile those MCP servers to Wasm component binaries that can be deployed to Kubernetes with Cosmonic Control.
Requirements
We'll need a handful of tools for this tutorial:
node- NodeJS runtimenpm- Node Package Manager (NPM) manages packages for the NodeJS ecosystemwash- Wasm Shell v2.0.0-rc.7 for developing and building Wasm components
- TypeScript (
npm install -g typescript)
Install Wasm Shell (wash)
On macOS and Linux, you can install wash with a quick curl of the install script:
curl -fsSL https://raw.githubusercontent.com/wasmcloud/wash/refs/heads/main/install.sh | bashFor installations on other systems, see the Wasm Shell Installation documentation.
Install OpenAPI2MCP
The OpenAPI2MCP npm module generates a TypeScript-based MCP server from 3.0.+ OpenAPI specifications.
Download OpenAPI2MCP:
npm install -g @cosmonic-labs/openapi2mcpGenerate MCP server
Create a new project based on the MCP server template and navigate to the project directory:
git clone https://github.com/cosmonic-labs/mcp-server-template-ts.git petstoreUse curl to download the PetStore API to your project directory:
curl -fLO https://raw.githubusercontent.com/cosmonic-labs/openapi2mcp/refs/heads/main/tests/petstore/input.jsonGenerate MCP tools into the server project from an OpenAPI specification:
openapi2mcp input.json --project-path petstoreWhen the process is complete, your MCP server will be ready.
Developing the MCP Server
Now we can use the wash dev command to start a development loop and run the MCP server:
wash devThe MCP server will run at http://127.0.0.1:8000/v1/mcp. When you start the development loop, wash will automatically launch the MCP Model Inspector.
Use the MCP Model Inspector
The official MCP model inspector is a useful tool for developing and debugging components. Using the model inspector, you can connect to the local MCP server via HTTP, manipulate resources, run tools, and more.
When you run wash dev, wash automatically launches the model inspector in your browser, pre-populated with the configuration you need to connect to your server.
Simply click Connect to connect the inspector to your server. The options should be configured as below:
- Transport Type: Streamable HTTP
- URL:
http://127.0.0.1:8000/v1/mcp
Connect to a Model
Testing the MCP server requires access to a model that acts as an MCP host. There are many ways to connect a model with your server—below we've outlined two approaches:
- Use Goose as a client for models in MCP development workflows. You can configure Goose to connect to a variety of models including Claude, ChatGPT, Gemini, locally-hosted open source LLMs, and more. (You can follow this approach for free and without creating accounts for other services.)
- Use ngrok to forward your local MCP server to a public HTTPS address so that MCP Hosts that require a signed certificate like Claude can connect.
Goose: Configuration and usage
Goose is an open source AI agent with the ability to connect to MCP Servers for development workflows. Follow the instructions in the Goose documentation to install Goose.
You'll need a MCP Host (like Goose, VS Code, etc) with tool-calling capabilities to test a MCP server. Otherwise, you can use the LLM model of your choice. Some AI assistants such as Google Gemini offer a free tier. In this example, we used Google Gemini (gemini-2.5-flash-lite-preview-06-17).
Follow the instructions in the Goose documentation to configure your LLM of choice.
Configure MCP Server as Extension
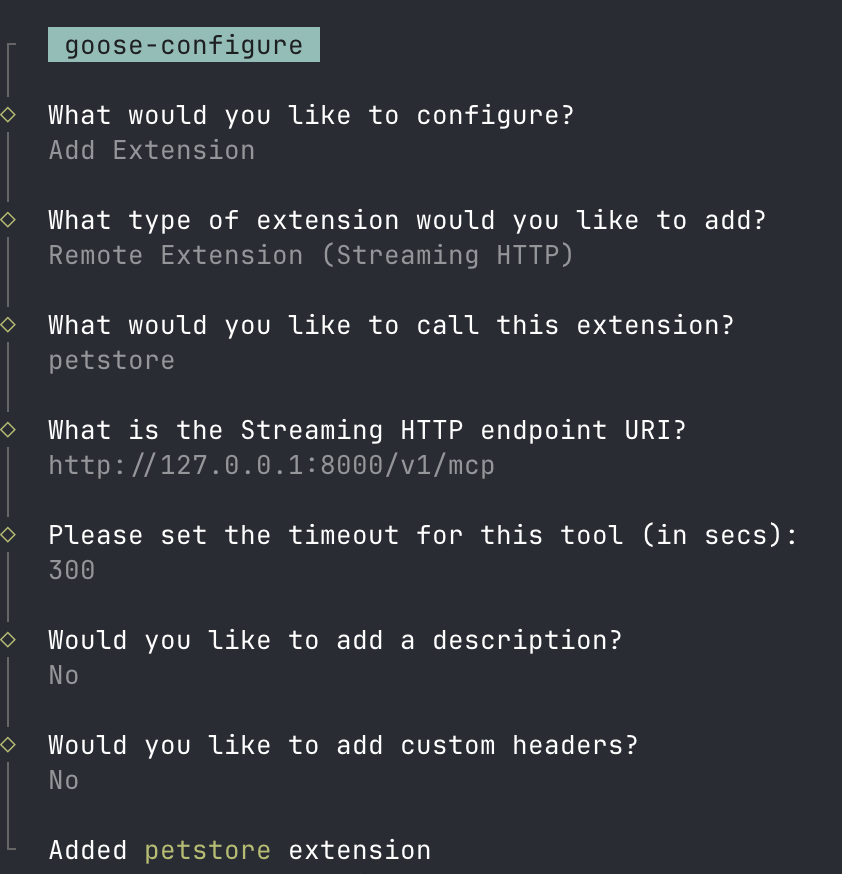
Goose refers to connected MCP servers as extensions. To add a new extension (i.e., configure Goose to act as an MCP client and connect to your MCP server), first run:
goose configureNext...
- Select Add Extension
- Select Remote Extension (Streaming HTTP)
- Call the extension
petstore - Set the Streaming HTTP endpoint URI to
http://127.0.0.1:8000/v1/mcp - You can set the timeout to the default
300
Using the Goose CLI, start a new LLM session:
goose sessionngrok: Configuration and usage
Goose does not require a HTTPS address, so if you are using Goose, you may skip this step.
ngrok is an API gateway that can be used to forward your local MCP server to a public HTTPS address. Note that you will need to sign up for an ngrok account.
Follow the instructions in the ngrok documentation to install the ngrok CLI and connect your account.
Once the CLI is installed and connected, forward your local server:
ngrok http http://localhost:8000Visit the site ngrok serves to enable the route, and copy the forwarding URL for future use. Note that adding the connection to Claude requires an endpoint of $FORWARDING_URL/v1/mcp.
Test the MCP Server
Give your LLM a prompt like:
What pets are available for adoption?Different models will produce different results—you may have to adjust the prompt to something like, Which pets have the status available in the petstore? The MCP server should return results from Swagger's Petstore V3:
( O)> What pets are available for adoption?
─── get_pet_find_by_status | petstore ──────────────────────────
status: available
Here are the pets currently available in the petstore:
* Dog 1 (ID: 4)
* Lion 1 (ID: 7)
* Lion 2 (ID: 8)
* Dog (ID: 123)
* MyPet (ID: 99999999)
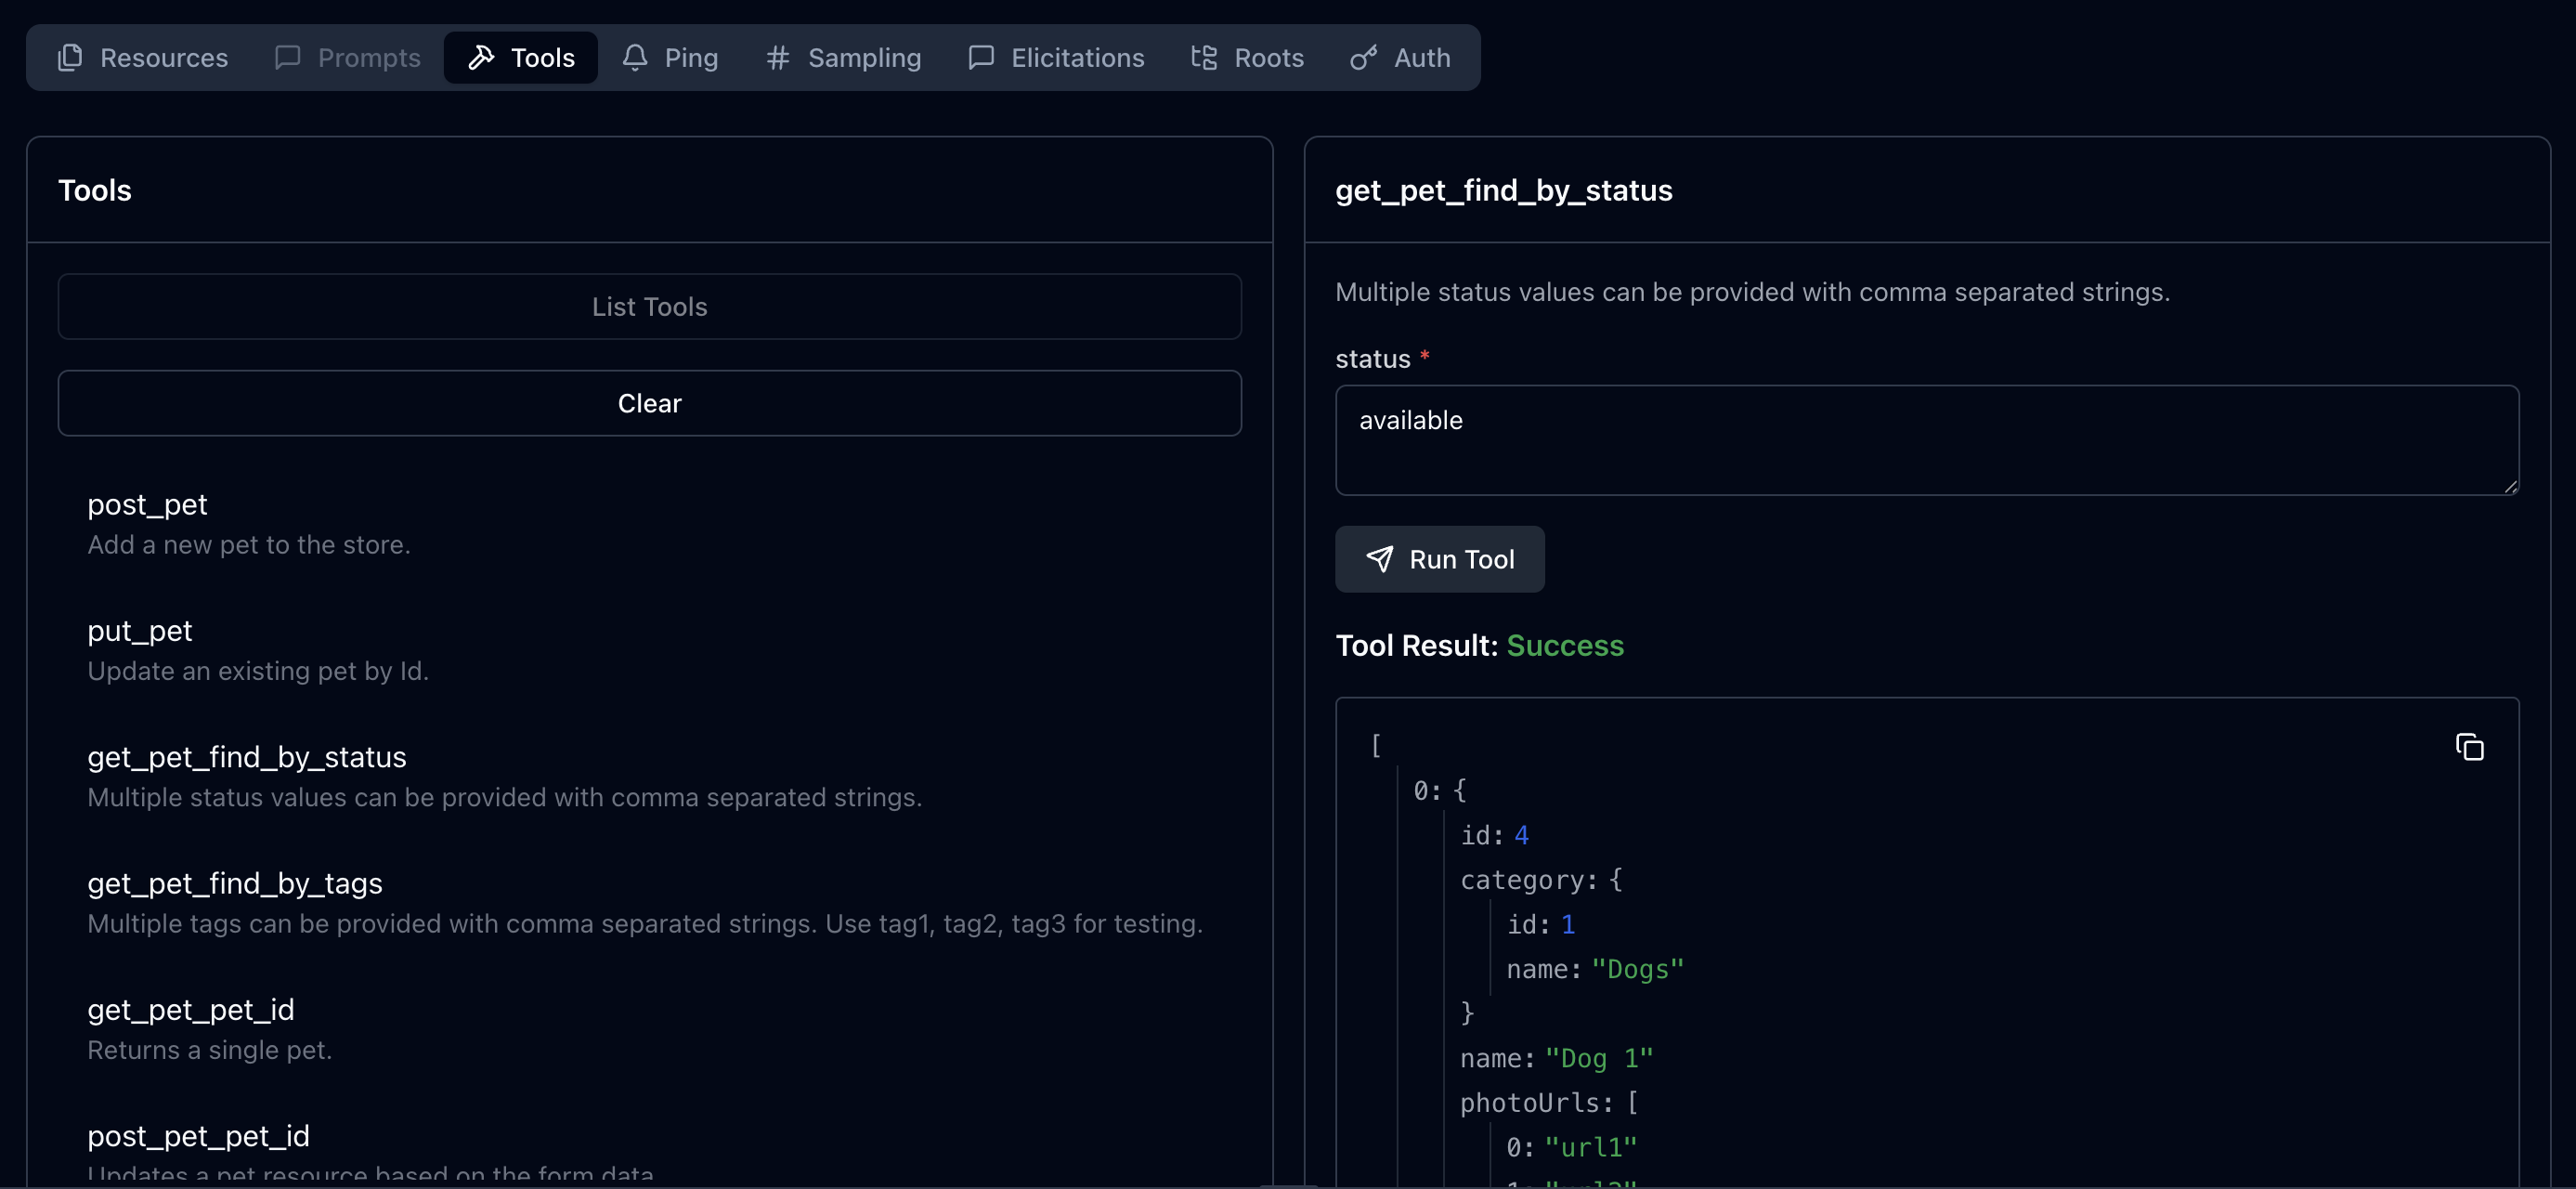
...In your MCP Inspector, you can compare the returned results with the JSON results for a direct tool call in the Tools tab.
Build the Wasm binary
From here, you have everything you need for a complete MCP server development workflow.
When you're ready to compile your MCP server to a Wasm binary, you can simply run:
wash buildYou can also use wash to push your Wasm binary to an OCI registry:
wash oci push ghcr.io/<your-namespace>/components/petstore-mcp:0.1.0 ./dist/component.wasmNext Steps
For information on deploying MCP servers like the one we built here, check out our blog, Remote-hosting Sandboxed MCP Servers with Wasm.
Have questions about sandboxed MCP server development, Wasm, or using open source platforms like wasmCloud to deploy server-side Wasm workloads? You can find the Cosmonic team on the wasmCloud Slack or at weekly wasmCloud community meetings. Hope to see you there!
Updated January 28, 2026